Modelling Notes:
Golden Arrow Productions Leader Kit
by Graham R 'Muz' Muspratt
 |
| Golden Arrow Productions usually sell the Leader in ready to
run form, however they will supply in kit form if requested. Mine came with the
body all ready finished in primer as it was taken off the production line for
the R-T-R version. Reasonable instructions are supplied including hand drawn exploded diagrams (which is more than you get with most Golden Arrow kits) along with very brief historical and simplistic livery advice, which implied that the Leader had black and red lining from when it first went on trial, but this was not strictly true as I have detailed in the section headed livery notes below. I have checked the kit against a dimensional drawing and have found it to be pretty accurate, although some careful adjustment of the bogie mounting points is required to reduce the height by approximately 1mm to be correct. Kit, as supplied:
Body: The power bogie assemblies are fixed into the body by
screws, self tapping screws are supplied in the kit for this purpose. I,
however, choose to drill and tap the cast resin body and glued in 8 BA studs
(simply made from screws with the head cut off and the thread carefully cleaned
with a die) and held the bogies on with nuts, rather than stress the resin
with the self tapping screws. This also makes it slightly easier to fit the
bogies to the body and removes the fear of the thread stripping in the cast
resin body. I will put a driver and a second man in the cab (the driver was never alone during the tests) of the number two end - see running note below, and the fireman gasping for cold air with his head out of the window of the central fireman's cab. Vacuum formed flush glazing is also supplied but as that leaves slightly rounded corners I prefer to cut individual windows from clear plastic and hold into place with a tiny drop of PVA glue (which glues totally clear) giving a good flush effect. 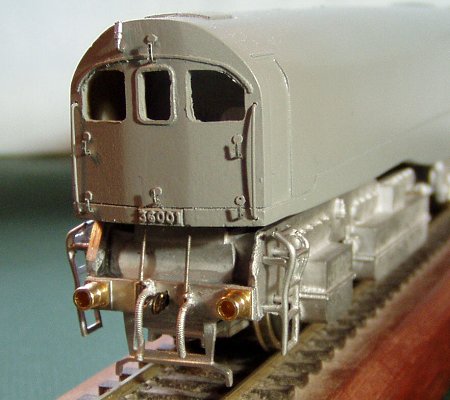 Power Bogies: The power bogie is designed to use a LH19 double ended motor with 40:1 worm and gear drive to two of the axles on the bogie. The Ready to Run version is supplied with one powered and one trailing bogie (which is made from identical parts - just doesn't have a motor fitted). I decided to make two identical powered versions. The LH19 motor is sandwiched between castings and packing must be used under the motor to ensure the correct meshing of the gears. This is a little time consuming to get right by trial and error. I used the time honoured approach and placed tissue paper between the worms and the gears to give the clearance that is required and then packed with plasticard to suit. The top white metal casting that holds the motor in place is also the bogie pivot point. I had to file this thinner to ensure that the body sat at the right height on the bogies and used low melt solder to fix into position, to ensure I could easily remove it if I need to replace the motor. The bogies are designed so that power is collected from opposite sides at each bogie with a single wire between the two, I added additional wire wiper pick ups to each bogie (allowing them to be independent units, useful when testing) and ran a pair of wires between them. 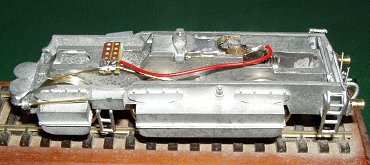
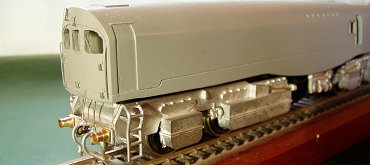
Overall: This kit gives, with a little care (and patience with the bogies), a good model and captures the imposing looks of the original well. The cast components were on the whole clean, and fitted together well. The power bogie construction could do with improvement to make it simpler to assemble but as already stated Golden Arrow do point out in the instructions that it was designed to be sold as a ready to run model and built on a jig rather than for home assembly. Golden Arrow do suggest an outline for a different drive arrangement if a larger motor is preferred, however I went for the option of motorising both bogies. The instructions sheet included hand drawn exploded
diagrams, gave a brief paragraph on the history and, as mentioned, simplistic
livery advice, but did in fact recommend referring to the Kevin Robertson Book
"Leader - Steam's Last Chance" Overall: Livery notes: 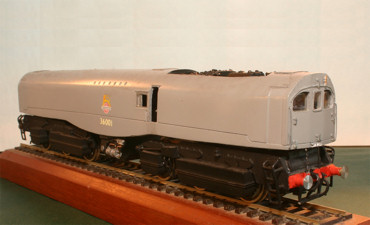
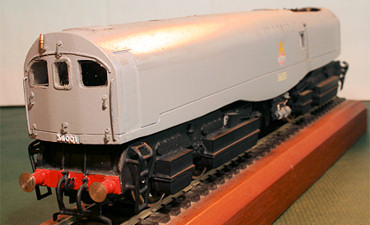
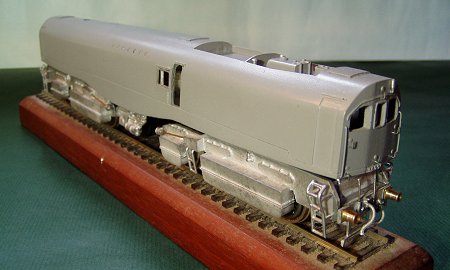
21 June 1949. Introduced in silvery light grey, no lining
or insignia. Cast number plate on front of each end. March 1951 project abandoned and 36001 scrapped along with 36002 which was virtually complete and 36003/4 which were in progress. It is also worth noting that from the limited photographs available it would appear that it was never cleaned! The instruction sheet was very simple and lacked any prototype backgrounds or history. Prototype running notes: Research: 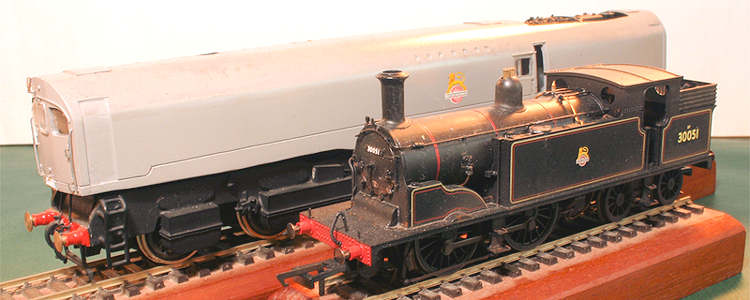 Leader alongside an M7. The intention was that the new locos would have the same route availability as the older ones. General notes on working with cast resin: Prior to painting clean the resin body thoroughly and I then suggest the use of a plastic primer. I use an aerosol version from Halfords. It is a common practice with white metal or brass kits, once a model body is washed prior to painting gently heat the body, in an oven, to ensure it is totally dry first and also to give a warm surface for the paint to adhere to. I must note here that extreme care must be taken with cast resign bodies with this practice otherwise warping could occur. |
all photographs are copyright Graham R 'Muz' Muspratt.
return to model railway product reviews index
This page was last updated 31 December 2007
![]()