Berwick
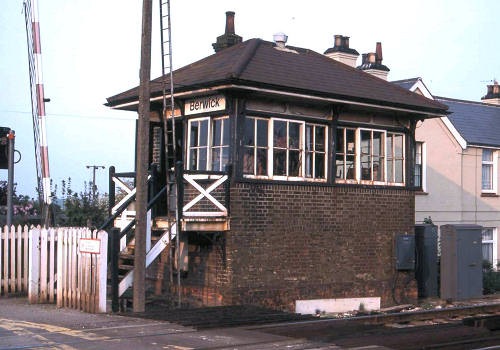
| Berwick Signalbox and level crossing, between Lewes
and Polegate, as photographed in May 1985.
photograph by Mark Westcott |
 |
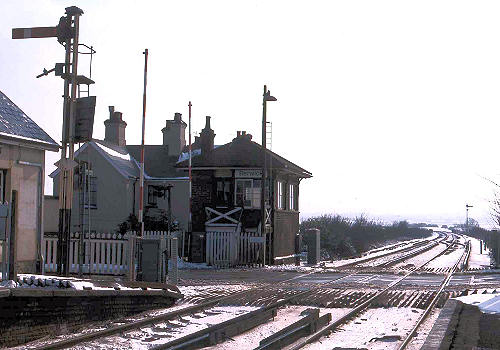 |
A wintry view of the box, taken in February 1986.
photograph by Mark Westcott |
| Followed by a summer view and a much smarter looking box!
photograph by Michael Taylor |
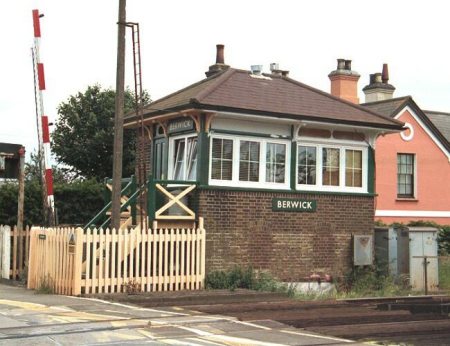 |
| Michael was told that one of the relief signalmen had asked if he could paint the box and when it was OK'd asked about colours and was told to make his own choice! At the time a work in progress. The "enamel" signs were in fact made from plywood. |
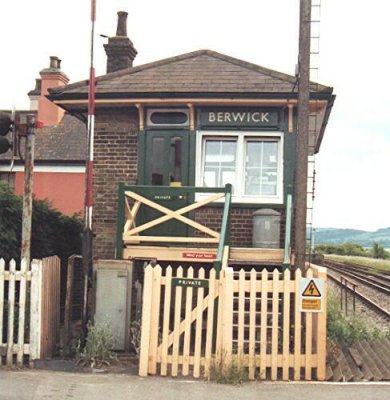 |
The side view of Berwick box, showing off well the BR(S) style
"enamel" sign.
photograph by Michael Taylor |
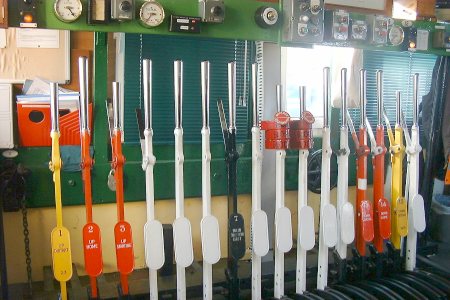
| The lever frame inside Berwick signalbox. The white levers
are "spares" that would, in days gone by, have been used to control
the sidings that were here.
Note the black chain on the left of the photo which has a wheel at the top that it is wound round. This is so that the length of a signal wire can be adjusted to allow for expansion and contraction caused when the temperature varies. On a long wire pull this can be quite noticeable. The three red "blocks" on each of the levers seventh and eighth from the right are lever collars, used as reminder devices when it is necessary to prevent the levers being pulled. photograph by Edmund Copping |
 |
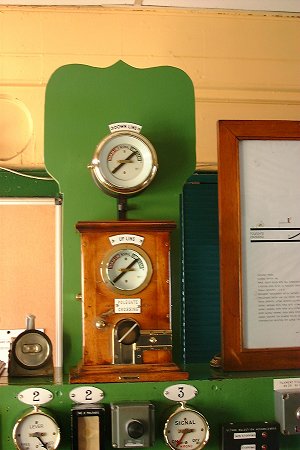 |
The Up direction block instrument. This is a standard three-wire,
three-position instrument with both block indicators showing "line
clear" The upper indicator shows that a Down train from Berwick has been
accepted by Polegate Crossing, whilst the lower indicator shows that an up
train from Polegate Crossing has been accepted by Berwick, but neither train
has as yet entered the section. When the down train enters section towards
Polegate Crossing the Signalman will send the Train Entering Section signal whereupon the Polegate Crossing
Signalman will acknowledge this signal and turn his commutator (the round knob
with a white stripe) to the left, thereby setting his lower and the
Berwick's upper Indicators to Train on Line. When the train has arrived at
Polegate Crossing, and has been seen to be complete, the Signalman there will
place the Block Instruments to the Normal position (by re-setting his
commutator to the upright position) and send Train Out of Section to Berwick.
Similarly, when the up train leaves Polegate Crossing the Signalman there will
send the Train Entering Section signal to Berwick where the Signalman will turn
his commutator to the left, thereby setting his lower and the Polegate
Crossing's upper Indicators to Train on Line. Once the train is clear of
the section the Berwick Signalman will reset his commutator to the Normal
position and send Train Out of Section to Polegate Crossing.
photograph by Edmund Copping |
| The Signalbox Diagram showing how Berwick controls the up
line as far as the Glynde Up Starting signal (at which point Lewes box
takes over) but only oversees the down line from immediately after the junction
of the Newhaven and Seaford branch to his Home signal. As can be seen from the
illumination, there is a train on the yellow track circuit.
photograph by Edmund Copping |
 |
| The duster under the diagram is for use each time a lever is moved. Being made of steel they would soon suffer from perspiration were the Signalman to use just his hands! |
All photographs are copyright
This page was last updated 22 May 2007
Return to Southern Signalboxes index
![]()